Sunkissed after sunset – date night with my number one

Thought I’d tell you a little bit about our Valentine’s Day, and it just so happens that Clarins and McDonald’s were part of it — ha! Clarins and McDonald’s, doesn’t really roll off the tongue does it? Sure, many people turn up their noses at me when I say I love McDonald’s, but our love for McDonald’s is r.e.a.l. Hence the name of this post sunkissed after sunset, a date night with my No.1 this Valentine’s Day.

This is my excited face. Excited for McDonald’s. 

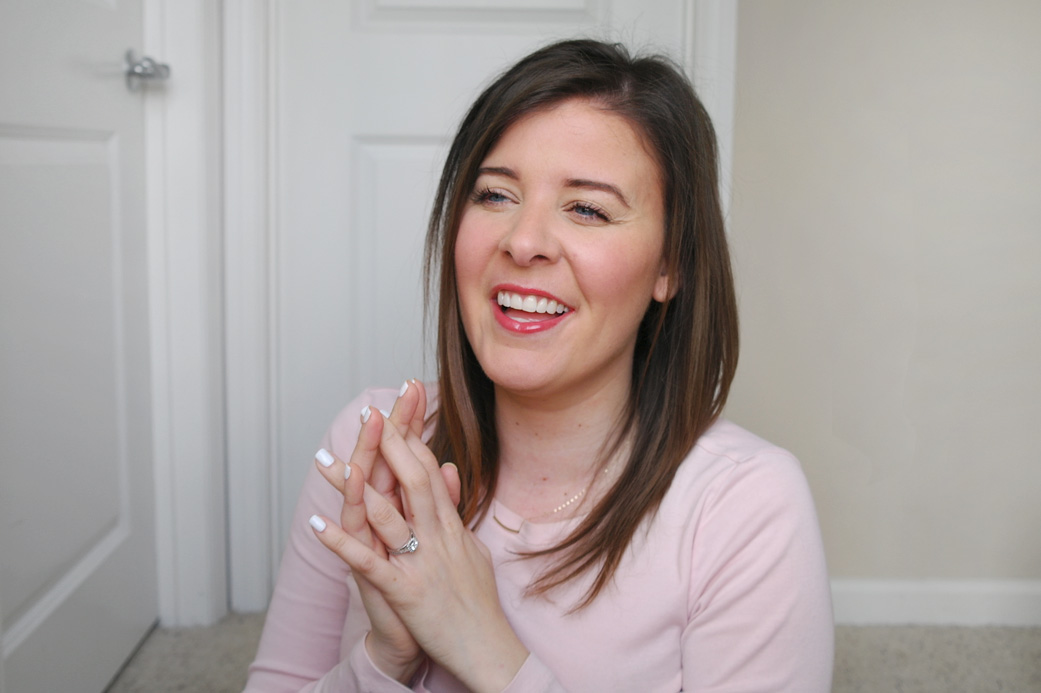
Don’t be throwin’ any shade at me, but Valentine’s Day at McDonald’s has been our tradition since we were in the first year of our relationship. Long time readers understand that we couldn’t possibly break the rules 12 years in. And Clarins is a product I used to look all dolled up for the evening of fine dining, ha!

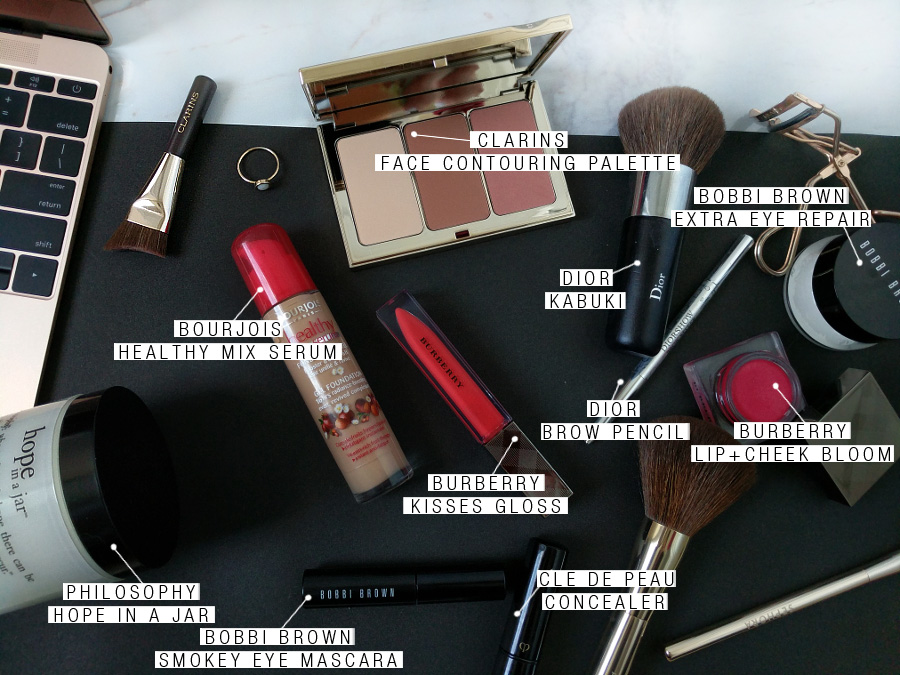
Let’s get to it! Here’s the full list of products I’ll be using.

Clarins Face Contouring Palette
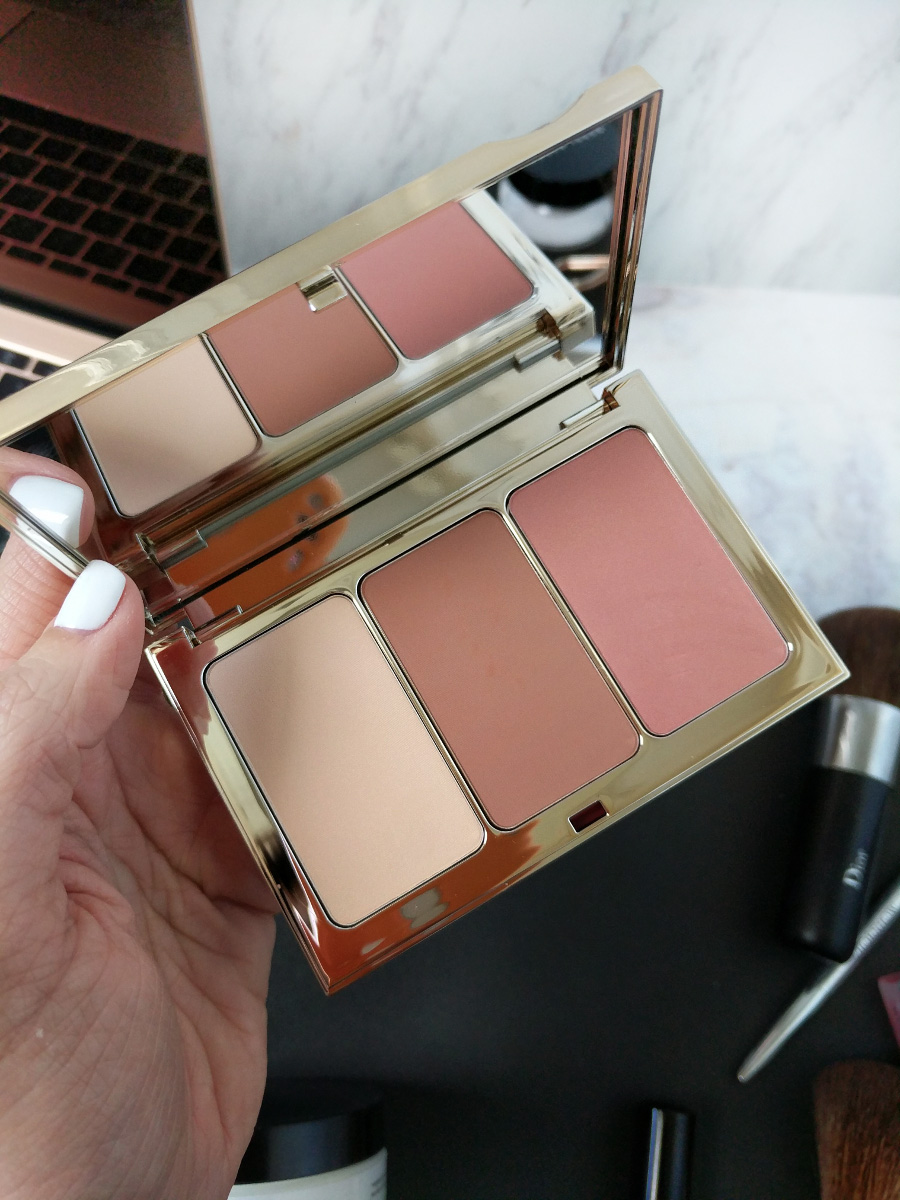
Clarins Face Contouring Palette|$42. (The Clarins Face Contouring Palette is another great gift thanks to the Octoly website where you can sign up for free product from Octoly if you have 10k+ on Instagram / 1K on YouTube.)

Left| a beige highlighter illuminates and creates depth
Middle| a bronzey deep shade to use for contouring, sculpting, and defining
Right| soft rose blush creates a healthy-looking glow

You know what? Thinking back on it, I’m pretty sure this is the first Clarins makeup product I’ve ever tried, apart from their self-tanner (which I used on my wedding day, fun fact!). I don’t use that self-tanner anymore because it doesn’t have a colour guide and I almost always missed a spot when self-tanning using their product.

I love doing these step-by-step tutorials, because it helps a lot of my readers out who are kinda new to makeup. As always I love to keep things natural looking, but definitely with an added sunkissed look. I amped it up on Valentine’s Day giving a sunkissed after sunset healthy look to the skin. Follow along with me, and I’ll show you exactly where I placed what products, and then give you a final look down below!

B’ys ya first gotta prep the face and hydrate it up. Otherwise the foundation and everything on top will be all cakey and gross. At least, in my experience with my weird dry skin. So, I’m using my ol’ faithfuls. Never stray from my Bobbi Brown Extra Eye repair cream + Philosophy Hope In A Jar moisturizer combo. It’s gold.

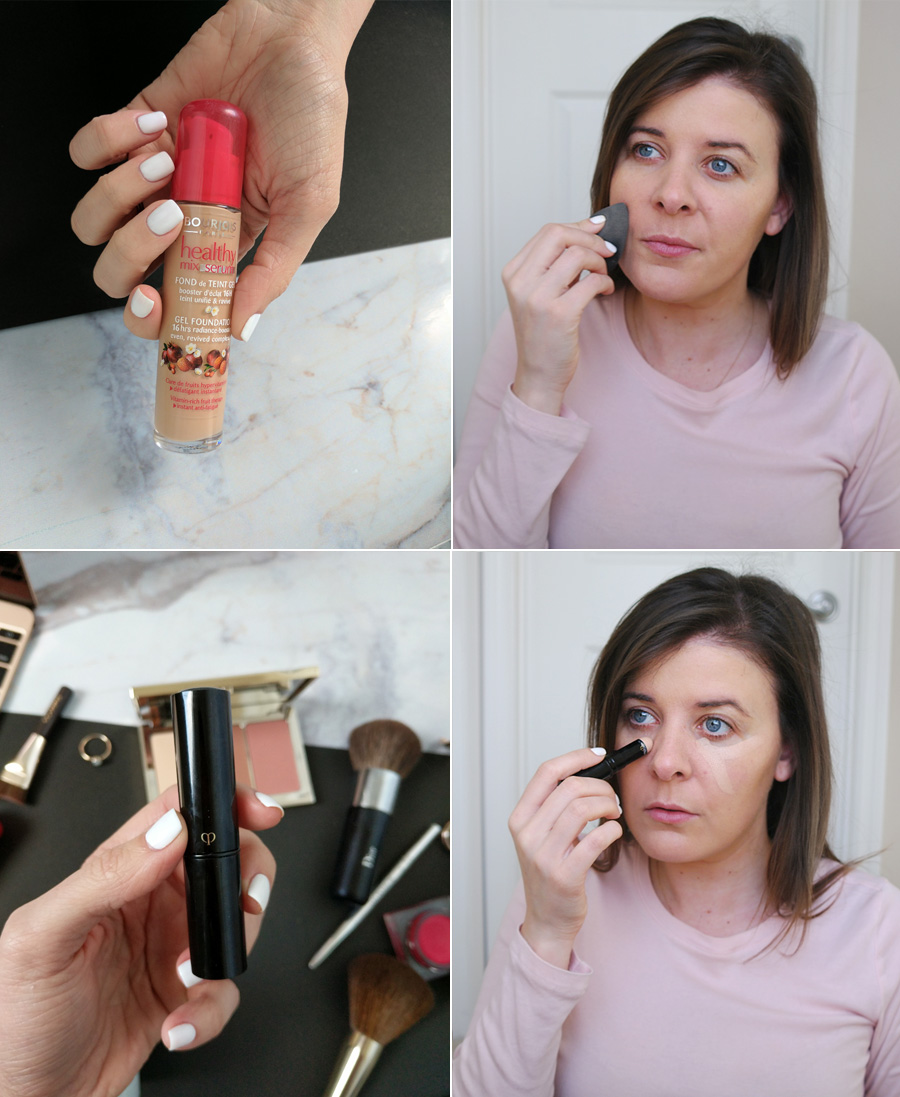
Once it all sinks in, I wet a sponge (looks like a BeautyBlender, it’s not – I got it in a swag bag from an event a while back) and apply my foundation with it, for a healthy radiance look to the skin. I wanna glow, baby, so I’ve reached for a lightweight foundation Bourjois Healthy Mix Foundation in 053 Dark Beige. I also never stray from my favourite concealer Cle de Peau in Beige.

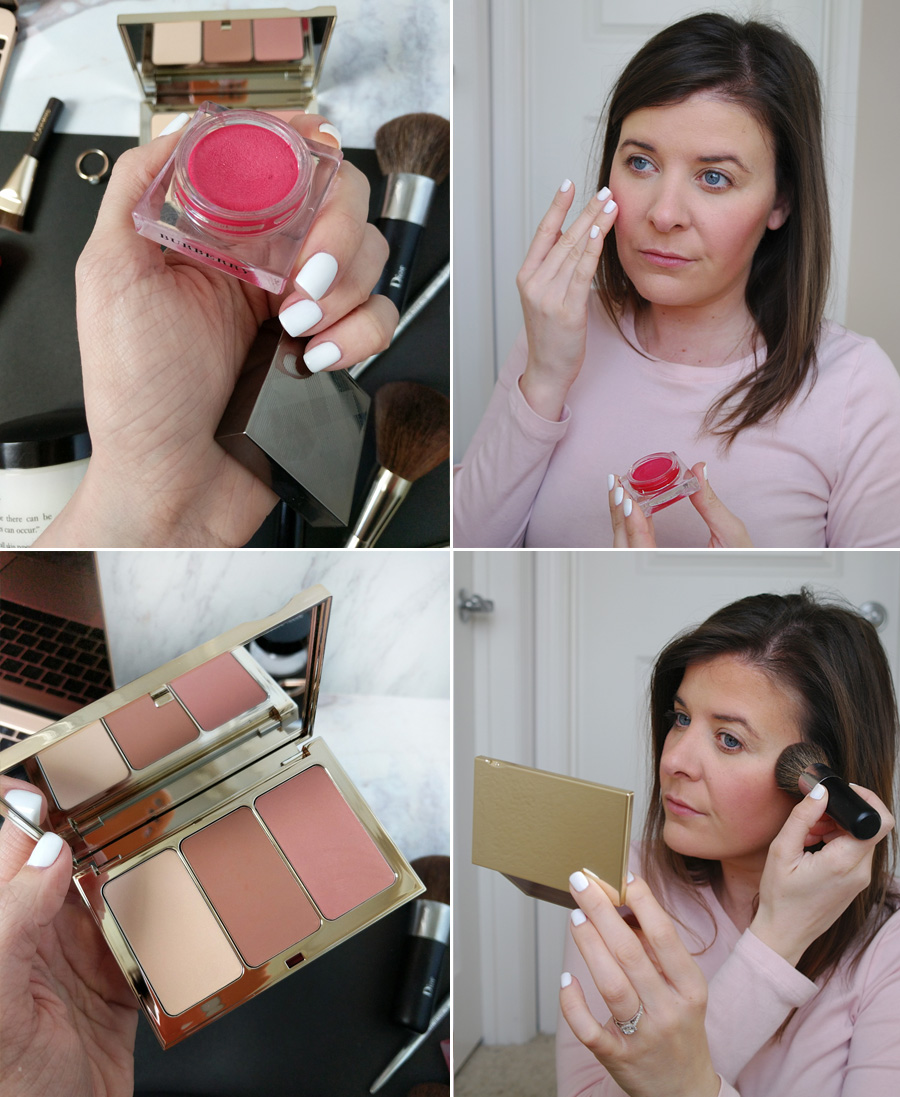
Ah my favourite two steps, adding dimension and a bitta colour to the cheeks. I dotted on Burberry lip and cheek bloom  ›  No. 09 Poppy then set it with the powder blush in the Clarins palette. Then I went to town on the bronzer shade buffing it in with my fave brush for bronzer, the Dior Brush Backstage Brushes Kabuki. I love looking tan, lol.

Since thicker brows are in, I have decided to continue filling them in and making them look prior to the days of waxing and plucking the heck out of them .Dior Diorshow Brow Styler inUniversal Brown is terrific for that, and the ultimate match for my lil’ brow hairs. For mascara I have been using theBobbi Brown Smokey Eye Mascara since right before Christmas. I don’t want it to ever dry out, and I would love it if Sephora (or other places) sold all-the-brands of travel sized mascaras. I think they last just as long, and half the price. Maybe that’s why they don’t do it… lol

Top it off with some gloss (because I was eatin’ McDonalds and definitely didn’t want my lipstick to fade all weird!) with Burberry Kisses Gloss in Tangerine No. 77!

The final look! Easy peasey right? :) 

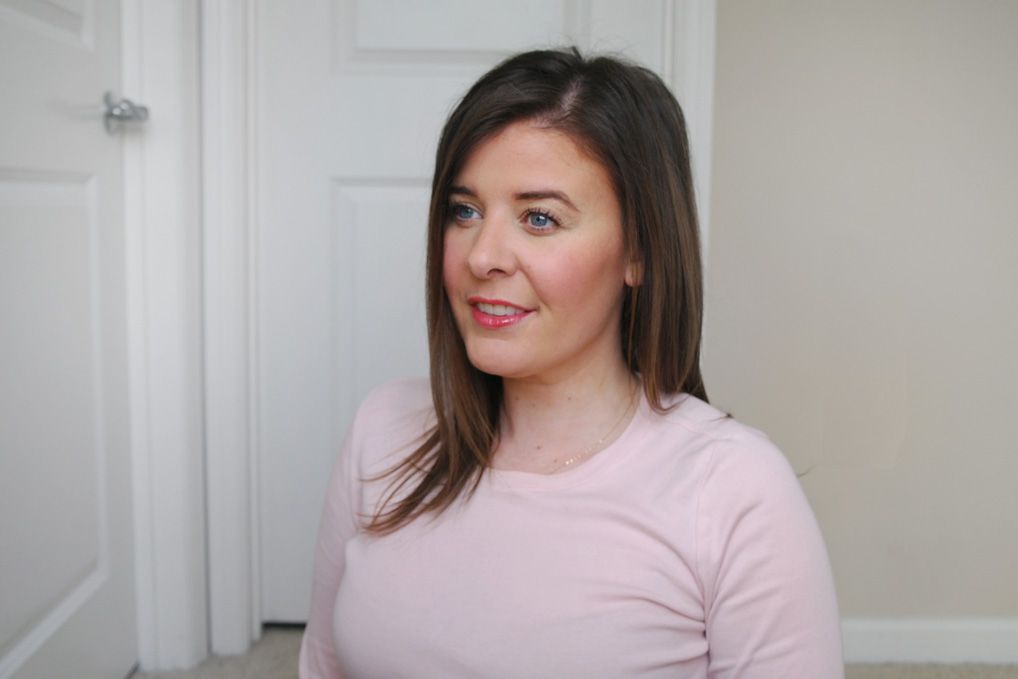
Although late posting it, I hope everyone had a nice Valentine’s Day :)

Face|

1| Philosophy  ›  Hope In A Jar moisturizer
2| Bourjois Healthy Mix Foundation  ›  053 Dark Beige
3| Cle de Peau concealer  ›  Beige
4| Clarins  ›  Face Contouring Palette
5| Dior Brush  ›  Backstage Brushes Kabuki
6| Burberry lip and cheek bloom  ›  No. 09 Poppy

Eyes|

7| Bobbi Brown  ›  Extra Eye repair cream
8| Dior Diorshow Brow Styler  ›  Universal Brown
9| Bobbi Brown  ›  Smokey Mascara

Lips|

10| Burberry Kisses Gloss  ›  Tangerine No. 77


Shop the look!


Disclaimer: I received this product complimentary from Clarins . All opinions are 100% my own #gifted #honestreview #octolyfamily

Continue Reading

Custom Lipsticks at BITE Lip Lab San Francisco

Bite Lip Lab on Fillmore, San FranciscoI would say my first introduction to the brand BITE Beauty was a pretty fantastic one. Having knowing about the brand, but never trying their products I was invited to create my own custom lipstick at the 4th, and brand new BITE Lip Lab in San Francisco on Fillmore Street.

As soon as I received the e-mail invite I knew immediately what kind of lipstick shade I wanted to create for myself. I have a Burberry gloss in a colour that I think is the perfect nude shade for my complexion, and I love it so much I wanted to make it in a lipstick form.

While the event happened a few weeks ago in the stormy weather (with tons of landslides, eek!) I’m Canadian and I’m going to admit that driving through the rain in Sunny California was just as bad as a mild Canadian snowstorm. Driving to The City (what the fancy folk call San Francisco) took twice as long, calling the roads treacherous was an understatement. California highways are not built for rain. Ya can say I was white-knucklin’er the entire way trying not to hydroplane too often. I made it, and I was early enough to snag free parking on a side street. Unheard of!

Bite Beauty Lip Lab San FranciscoAs soon as I stepped inside from the gloomy weather outside, I was greeted by many smiling faces, and Canadians too! Susanne Langmuir, founder of BITE is a Torontonian and came down for the event — definitely cool to meet her in person.

How to make your own lipstickWhen you arrive at a Bite Beauty Lip Lab, you’ll work with a Lip Lab Artist and have your choice of the following services:

CUSTOM LIPSTICK
1 lipstick | $55 -Or- 2 lipsticks| $80

a] choose a shade from 200 lip pigments
b] pick a finish: glossy sheer, matte creme, amuse bouche
c] pick an all-natural scent: 9 scent to choose from

BESPOKE LIPSTICK
2 lipsticks | $150

a] Work with your Lip Lab Artist to create a unique lipstick colour of your choice
b] pick a finish
c] pick an all-natural scent

Katie, a BITE Lip Lab Artist sat down with me and we got to work on my custom lipstick! I prepped my lips before starting, and applied their Agave Sugar Lip Scrub followed up with the Agave Lip Balm. They gifted us those two in a goodie bag in addition to their popular seller, Lip Mask.

Mixing Lipsticks at Bite Lip Lab

I was so prepared you guys. I sat down in front of their ‘new neutrals’ set of pigments as I knew that I wanted to venture into that realm of colours. Because I work with many lipstick colours as a beauty blogger, I already know what shades suit me and what don’t. I found my peachy-nude shade on the second go, and was ready to select the finish and create the lipstick then-and-there. What I wasn’t expecting was to choose a matte finish, assuming it would be drying for my lips. Not this one by BITE though, it was a matte creme and felt so comfortable on. I also got to pick an all-natural scent for my custom lipstick. I ended up mixing coconut and mint together for my nude lipstick! An odd paring, right? But it smells fantastic. Here’s the colour on me! 

Bite Beauty Custom Lipstick in 411MSince I found my perfect shade so quickly, we decided to play around with more colours. If I was going to made a second colour, it would hands-down, be this orange-red shade. I love a good orange-red and although definitely an outstanding bold colour, I think it pairs well against my teeth and skintone, Ha! Not humble-sounding at all, am I?

Most noteworthy, the entire experience at BITE Lip Lab is pretty impressive. From picking out your custom shade, to watching it get mixed with a finish + scent of your choice, then have it be frozen-in-time to a solid in 7 minutes, then carefully applying the bare naked lipstick colour to the plastic bullet. So fun! Therefore, I suggest a lipstick lover to do it at least once in your life, especially if you’re one of those ladies who had a favourite lipstick that ended up getting discontinued. This is the way to bring that long-lost shade back to in your life by choosing the Bespoke Lipstick service.

Products mentioned:


BITE Beauty Lip Lab
2142 Fillmore Street
San Francisco, CA
628.444.3770
Hours: Monday – Saturday 11 – 7 / Sunday 11 – 6
Instagram | Twitter | Facebook

Continue Reading

Back To Basics feat. AVEDA

Not by any stretch am I calling Aveda basic. But it was the first salon-grade shampoo I purchased, and kept purchasing for years on end until I moved out of Newfoundland. I guess when you’re paying rent for the first time, priorities change. Like buying food, instead of fancy hair products. [Products shown: Aveda Brilliant Shampoo + Condtioner]. If I’m being completely honest I do love the shampoo, but would prefer a deep conditioning and hydrating conditioner. I probably wouldn’t purchase the conditioner again, and I would go back to my ol’ faves (which I’ll talk about below).

Now that I’ve decluttered and eliminated a lot of the goodies in my bathroom cabinet (many shampoos, and hair products that didn’t really do it for me anymore), I’m going back to basics.

Back in the day my hair was healthy and shiny, and lately changing up my shampoos with different brands every few months didn’t help the situation. My hair needs to go back to wonderful Aveda products. And 2017 is the time. Doesn’t that sound dramatic! Ha!

But honestly, trying new beauty products, hair care, or skincare is great and all, especially being a blogger who receives PR samples. But I think I need to start getting back to basics with regards to skincare, and especially hair care. For the past 6+ months I’ve been using a shampoo/conditioner combo (not a two-in-one, nevah!) that has been just okay. But ever since I got back from Canada, my scalp has not been the same. A little painful, with a bit of dandruff that never seemed to go away, and my hair was so incredibly greasy come day two. January I started going back to Aveda. And boom, it changed.

Aveda was a brand I had used for years before I knew what PR samples even were. I’m talking old school years ago, back in 2002 or 2003 is when I was introduced to the brand. My hair loved that stuff, ate it up! Plus, not to mention the scent of everything Aveda makes brings back so many awesome memories.

This pomade (Aveda Brilliant anti-humectant pomade) brings back a bit of a sad time in my life but I’ve decided to turn it into a positive. My Dad liked the scent of it and commented on it. Which for the past year made me sad when I smelled it, and as most of you all know he’s no longer here with us. But I’ve decided to turn it around — wear it, think of the good times. Those memories only make me sad, because of the great relationship I’ve had with him. Right? He was the best. The bottle I’m showing you is ancient, but it’s still good to use and smells just like the new one. I’m not telling you how old that jar I have is, though ;)

Aveda sent a few items over, and items that I recognized but never tried out. For instance I’ve been using the Brilliant line of pomade for 10+ years, but never used that line of shampoo/conditioner as I always reached for the ol’ faves like Rosemary Mint shampoo, Colour Conserve, or the Shampure line. I don’t love putting tons of product in my hair every time I wash it, but when I want fuller hair I grab the Thickening Tonic (first time using it, but I’ve used their Volumizing Tonic which used to come in a stubby glass bottle). When I dry my hair I separate it into three layers, and each layer before blow drying gets 2-3 spritzes of Thickening Tonic in it…my hair feels touchably thicker which is fantastic when you have such fine hair it you have to do 4 loops in your hair elastic to make my pony tail feel secure!

Clearly I can talk for days about Aveda, but I’m going to leave it here with a request for them.

I do want to ask Aveda to bring back their old school hair brushes. This is the oldest brush, and I use it every time I blow-dry my hair to get volume. I think the reason I love it so much is it has a freakin’ pick at the bottom of the brush (you can pop it out, and place the pointy-pick inside the handle so it doesn’t always stick out). I still have yet to find another brush that has that, and Aveda stopped making/carrying it as far as I understand. Bring it back! I desperately want a new one, the bristles are sunken right in! Lol

Disclaimer: This post although high praises, is not sponsored by Aveda, or anyone. Aveda sent me product, but as I stated above I’ve been a huge lover of Aveda for years, and regardless of working with them, I will continue to purchase their awesome products. Yay them!

Continue Reading